XAMPP Server Made Simple – Even Your Kids Can Understand It
XAMPP Server is one of the most widely used cross-platform web servers. If you are a beginner website developer then you then it is important for you to understand the importance of cross-platform web servers. Cross-Platform web servers are available for OS like Windows, MAC, and Linux, etc, hence the name cross-platform.
In this article, we will discuss the XAMPP. We have tried to make the article as simple as possible for a better understanding of absolute beginners. Below is the table of content that you should follow to have a clear understanding of the XAMPP server. After reading and practicing the content of this XAMPP tutorial you will be able to answer the below queries:
What is XAMPP Server?
How to Install XAMPP Server?
Run and Configure XAMPP Control Panel
Testing the Installation of XAMPP Server
What is XAMPP Server?
XAMPP is a free and open-source cross-platform web server which can be installed on your local computer. Apache Friends is a non-profit organization that developed XAMPP. Developers use the XAMPP for creating and testing the programs on the local web servers. It consists of Apache HTTP Server, MariaDB database, and interpreters for PHP and Pearl. XAMPP Server uses Apache Service for creating a local server. Also, it uses MySQL/MariaDB for creating the database for the website. Most of the actual web servers use similar components.
Description on the acronym:
X – X refers to Cross-Platform. XAMPP application may run on any computer machine and with any Operating Software.
A – A refers to Apache or Apache HTTP Service. Apache service helps in running applications like PHP. Apache is one of the most usable web server applications.
M – M refers to Maria DB. Earlier it was MySQL but it was replaced by MariaDB from version 5.5.30.
P – P refers to PHP. PHP stands for Hypertext Processor which provides an environment for website development. PHP is a side scripting language.
P – The second P refers to PERL. Perl stands for Practical Extraction and Reporting Language which is used for developing web applications.
XAMPP allows you to install various CMS on the top of it like Joomla, Drupal, WordPress etc. The XAMPP installer includes the below applications:
- Apache 2.4.46
- MariaDB 10.4.14
- PHP 7.4.10
- phpMyAdmin 5.0.2
- OpenSSL 1.1.1
- XAMPP Control Panel 3.2.4
- Webalizer 2.23-04
- Mercury Mail Transport System 4.63
- FileZilla FTP Server 0.9.41
- Tomcat 7.0.105 (with mod_proxy_ajp as connector)
- Strawberry Perl 5.32.0.1 Portable
How to Install XAMPP Server
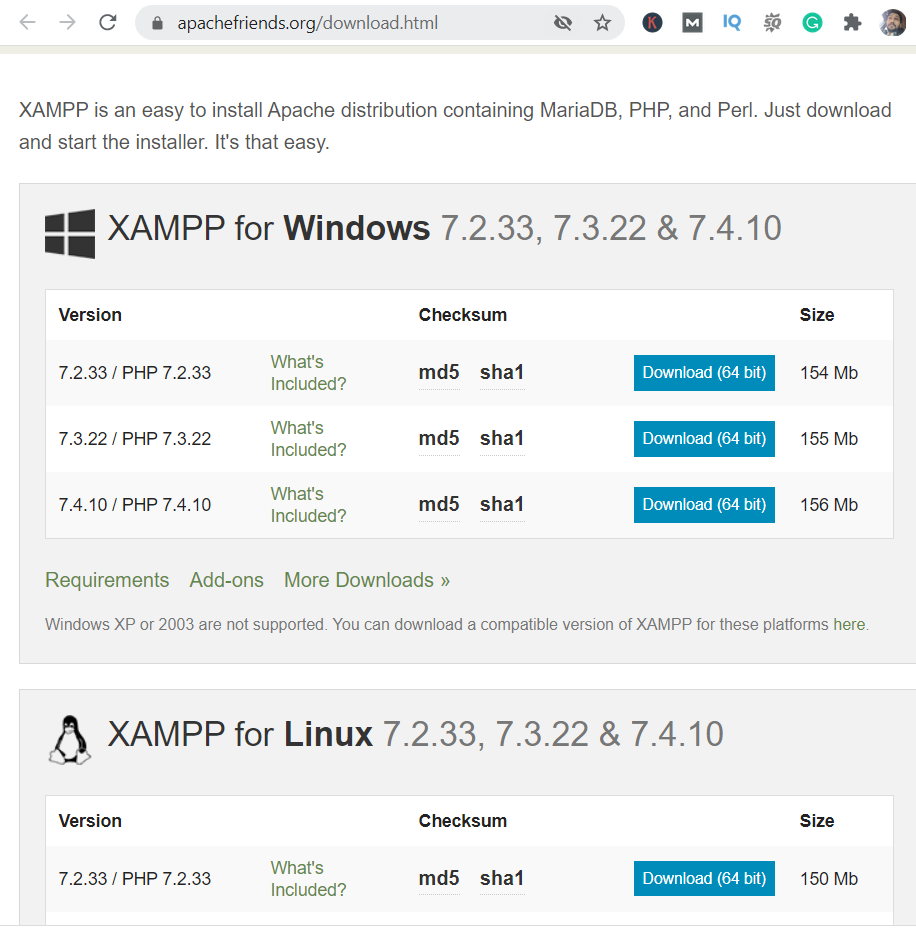
For the download and the installation of the XAMPP server, there are certain steps that need to be followed. For this, we first need to visit a website and the link of the website would be https://www.apachefriends.org/download.html. You can reach the download page for downloading the executable file for the XAMPP server installation. On the webpage you will find the download installers for Windows, Linux, and OS X. As per your operating system, you can click on the download button to download the executable file.
Step 1 – Run the XAMPP Server Installer
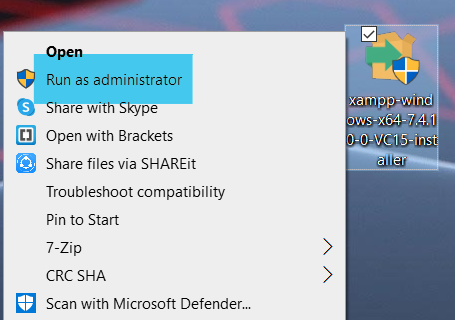
Once the executable file is download now is the time to run the installation file. You need to run the file as an administrator. To do that you simply need to right-click on the executable file and click on ‘Run as administrator‘ as in the image below.
Step 2 – Allow User Access Control (if asked)
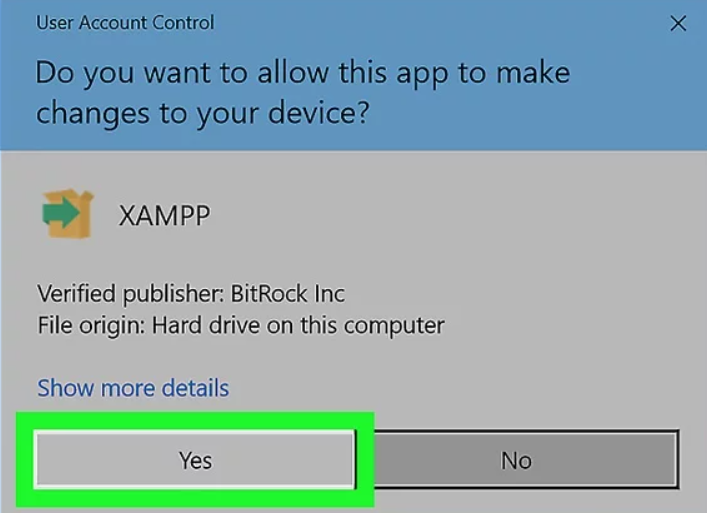
In certain cases, once you run the installer, you will get a User Access Control Pop-Up. You need to select Yes on the pop-up to proceed with the XAMPP installation.
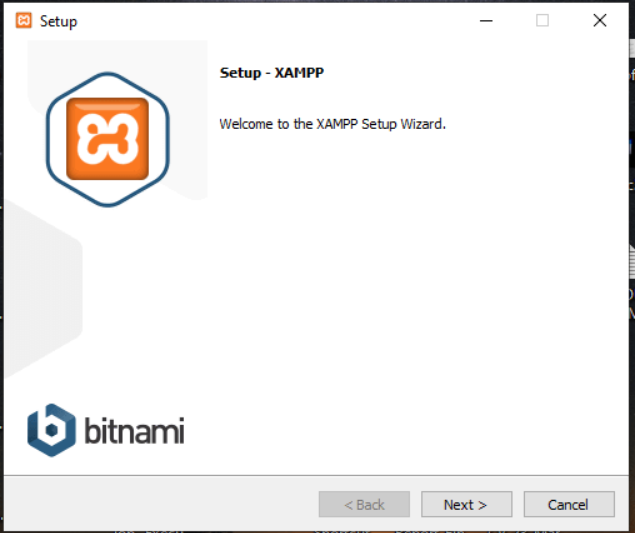
Step 3 – Welcome Wizard
Once you click on Yes on User Access Control you will get a Set-Up wizard pop-up. Set up wizard is a series of steps that take place for installing any application on the computer hard drive. Once you get the Welcome window you have to click on the Yes button to move on the next step.
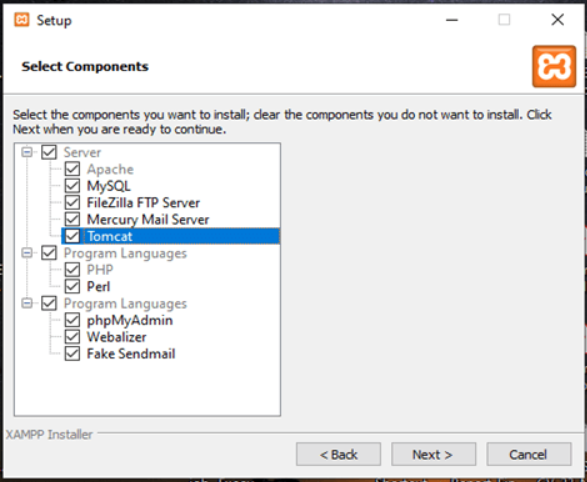
Step 4 – Component Selection for XAMPP Server
Now click on the Next button. You will get the wizard window to select the components which you would like to install with XAMPP. You can keep the selection as it is or make specific selections for the installation. Click on next to start the installation process.
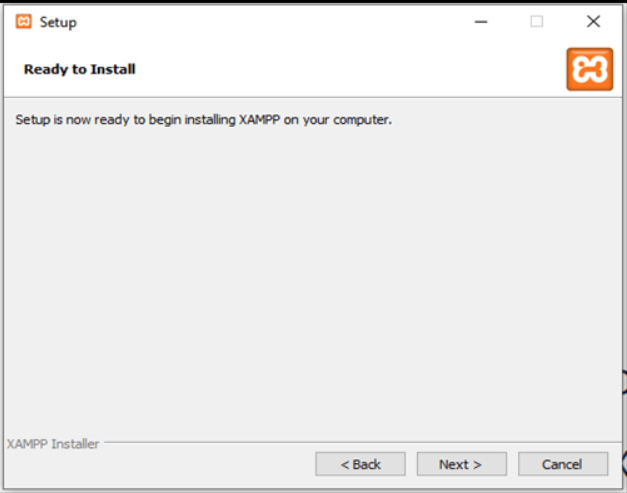
Step 5 – Ready to Install Window
You will get the ready to install window. Select Next and choose the folder path where XAMPP will be installed.
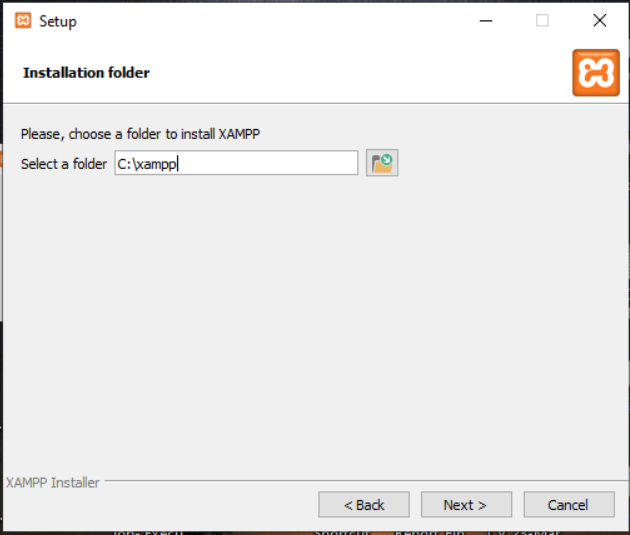
The XAMPP Server installation process will start. Once the installation process is completed you will get a window similar to the below image. Click on Finish to complete the process.
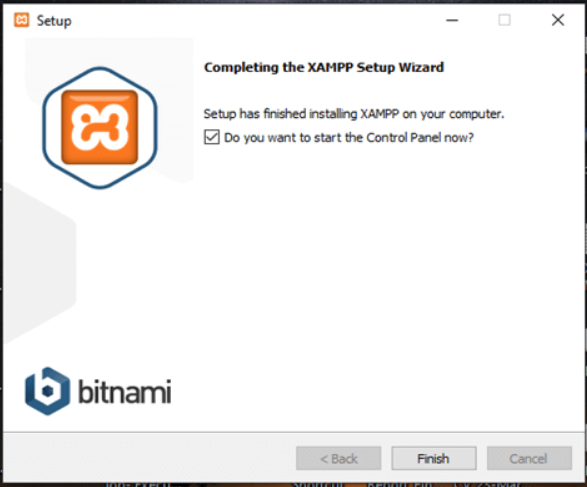
Now we have installed XAMPP server on our computer. Let us see how we can run and configure XAMPP on our local computer.
Run and Configure XAMPP Server Control Panel
The default file location of the XAMPP Server installation is C:/XAMPP/. XAMPP provides a Control Panel for efficient easy management of the software packages which are available in XAMPP. To start using the installed XAMPP server you need to follow the below-mentioned steps:
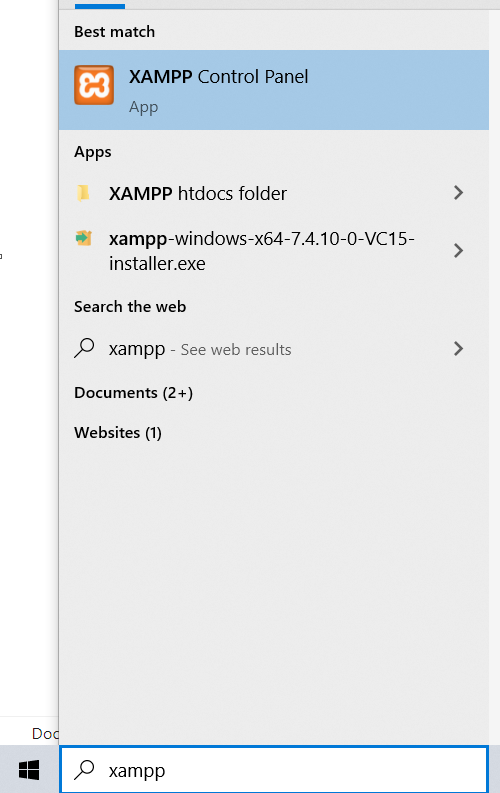
- Click on the Windows start button and search for XAMPP.
- You will find the XAMPP Control Panel so click on it to initialize it.
- The XAMPP Control Panel will open with a list of installed Modules.
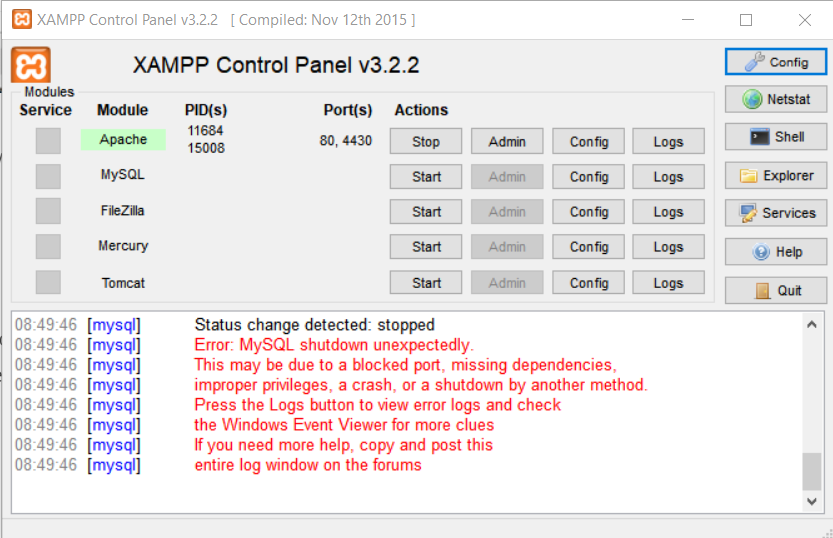
The above image is the way the XAMPP Control Panel looks like. XAMPP Control Panel has few columns as you can see for Module Service, Module, PID(s), Port(s), and Actions.
Module: Represents the software packages/services installed with XAMPP Server.
PID(s): PID represents the Process IDs for the modules.
Port(s): Every component is having its own unique ports. For example, Apache needs 2 ports, one for HTTP which is default port 80, and the second for HTTPS/SSL which is default port 443.
Actions Section:
Start/Stop Button: This button allows you to Stop/Start the modules/service.
Admin Button: As soon as you click the Start button, the Admin button will be activated. Once you click on the Admin button, a link for the XAMPP dashboard will open up (http://localhost/dashboard/).
Config Button: The 3rd button on the XAMPP Control panel is the Config button. Once you click on the Config button, you will be getting the list of the configuration files for that component. To edit those configuration files you need to click on the configuration and then make the changes and then save it.
Logs Button: The 4th Button on the panel for the component is the Logs button. Once you click on the Logs button, you will be getting the list of the log files for that component. To check the log files you need to click on the Logs button and click on the log file you want to check.
Module
The modules in XAMPP server control panel include the below mentioned packages.
Apache: Apache is a web server on the web which is responsible for processing and supplying the web content on the computer.
MySQL: MySQL is an open-source database that stores the data of web applications.
FileZilla: This is an FTP server (File Transfer Protocol) which is responsible for smooth file transfer from the server and the local computer.
Mercury: Open-source mail server
Tomcat: Freeware java servelet for serving the Java Applications.
Additional Buttons
- Config: This button allows you to configure the XAMPP as well as the individual components
- Netstat: This button gives information on all running processes on the local computer
- Shell: This button will open a UNIX shell
- Explorer: When you will click on the explorer button it will open the XAMPP folder in Windows Explorer. The default location of the XAMPP folder is C:/XAMPP.
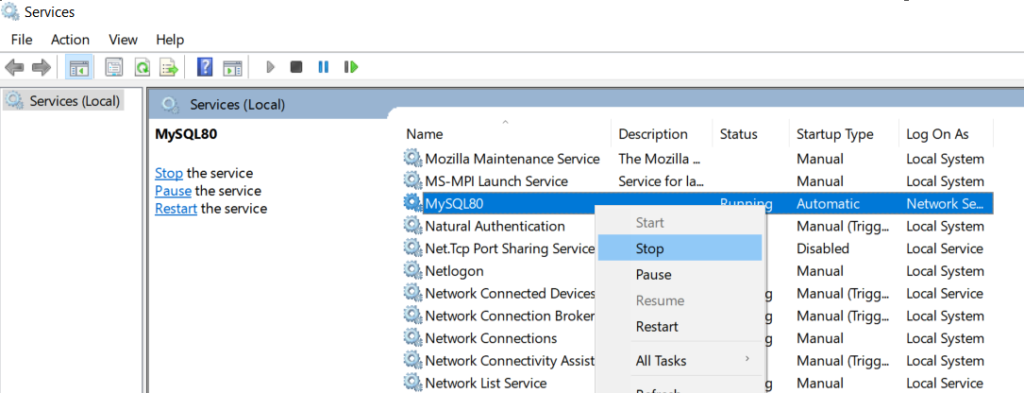
- Services: when you click on the services button it will show all services currently running in the background. This will open the computer services window which you can also get typing services.msc in the Run/Search dialog box.
- Help: This will give you links to user forums of the apache-friends website.
- Quit: closes the XAMPP Control Panel
Testing the Installation of XAMPP Server
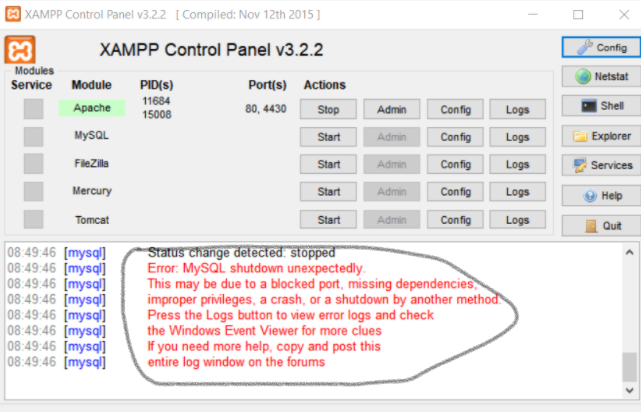
After the completion of the XAMPP server installation now we will test the environment. Once you initialize the XAMPP control panel, you need to ensure that both Apache and MySQL services must be running. Just in case you are not able to start MySQL service and while starting MySQL it is throwing an error like in the image above, then follow the below steps.
- Go-To start Menu.
- Search for services.msc and press enter.
- The Services window will appear on the screen.
- From the right panel find MySQL service.
- Right-click and Stop the Service.
- Open the XAMPP Control Panel again and Start MySQL. It will start working fine.
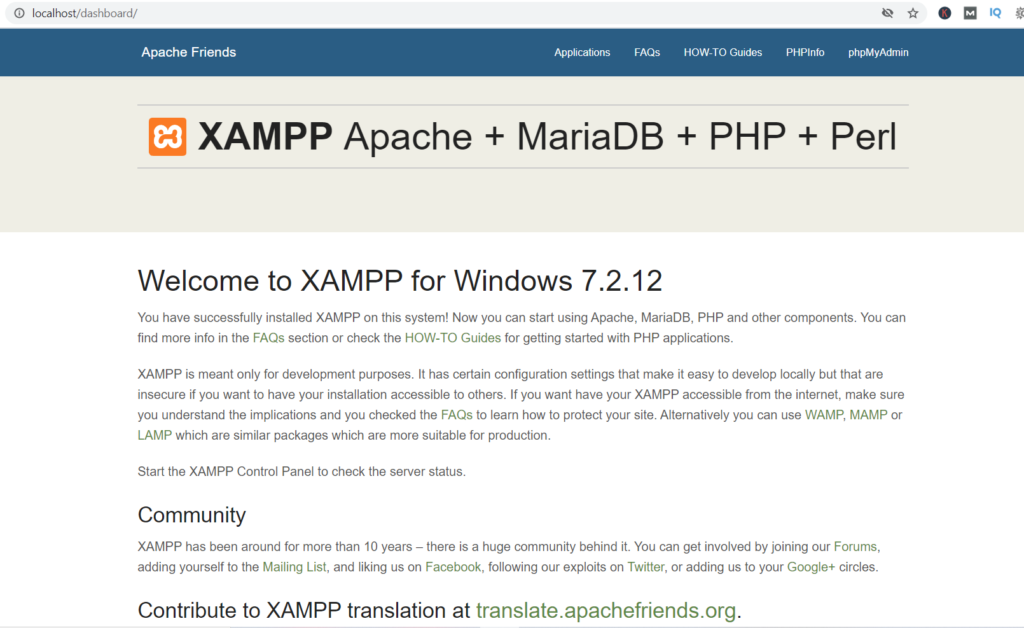
Now you are all set to test your web server. Once you initialize XAMPP control panel and start the Apache and MySQL services. After that open any of your web browser like Google Chrome. In the URL box or the address bar enter localhost and press enter. You will get the below page and you are all set and ready to proceed with creating and testing your web applications.
Conclusion
In this article, we have learned some very basic concepts of the XAMPP server. We have prepared this tutorial post keeping in mind that even absolute beginners will be able to understand the content and perform the steps without any further help. XAMPP server is used by most of the web developers because of its cross-platform and open-source nature. Once you take a step further into website development you will realize that the XAMPP server provides extensive features to many of the content management systems which makes it so popular.
If you have any queries regarding this article or any doubts which come up in your mind, or if you have any feedback or suggestions, then reach out to us via comment section or write to us on the Contact Us page.

